
Bird Photography 101
A guide to getting started with bird photography


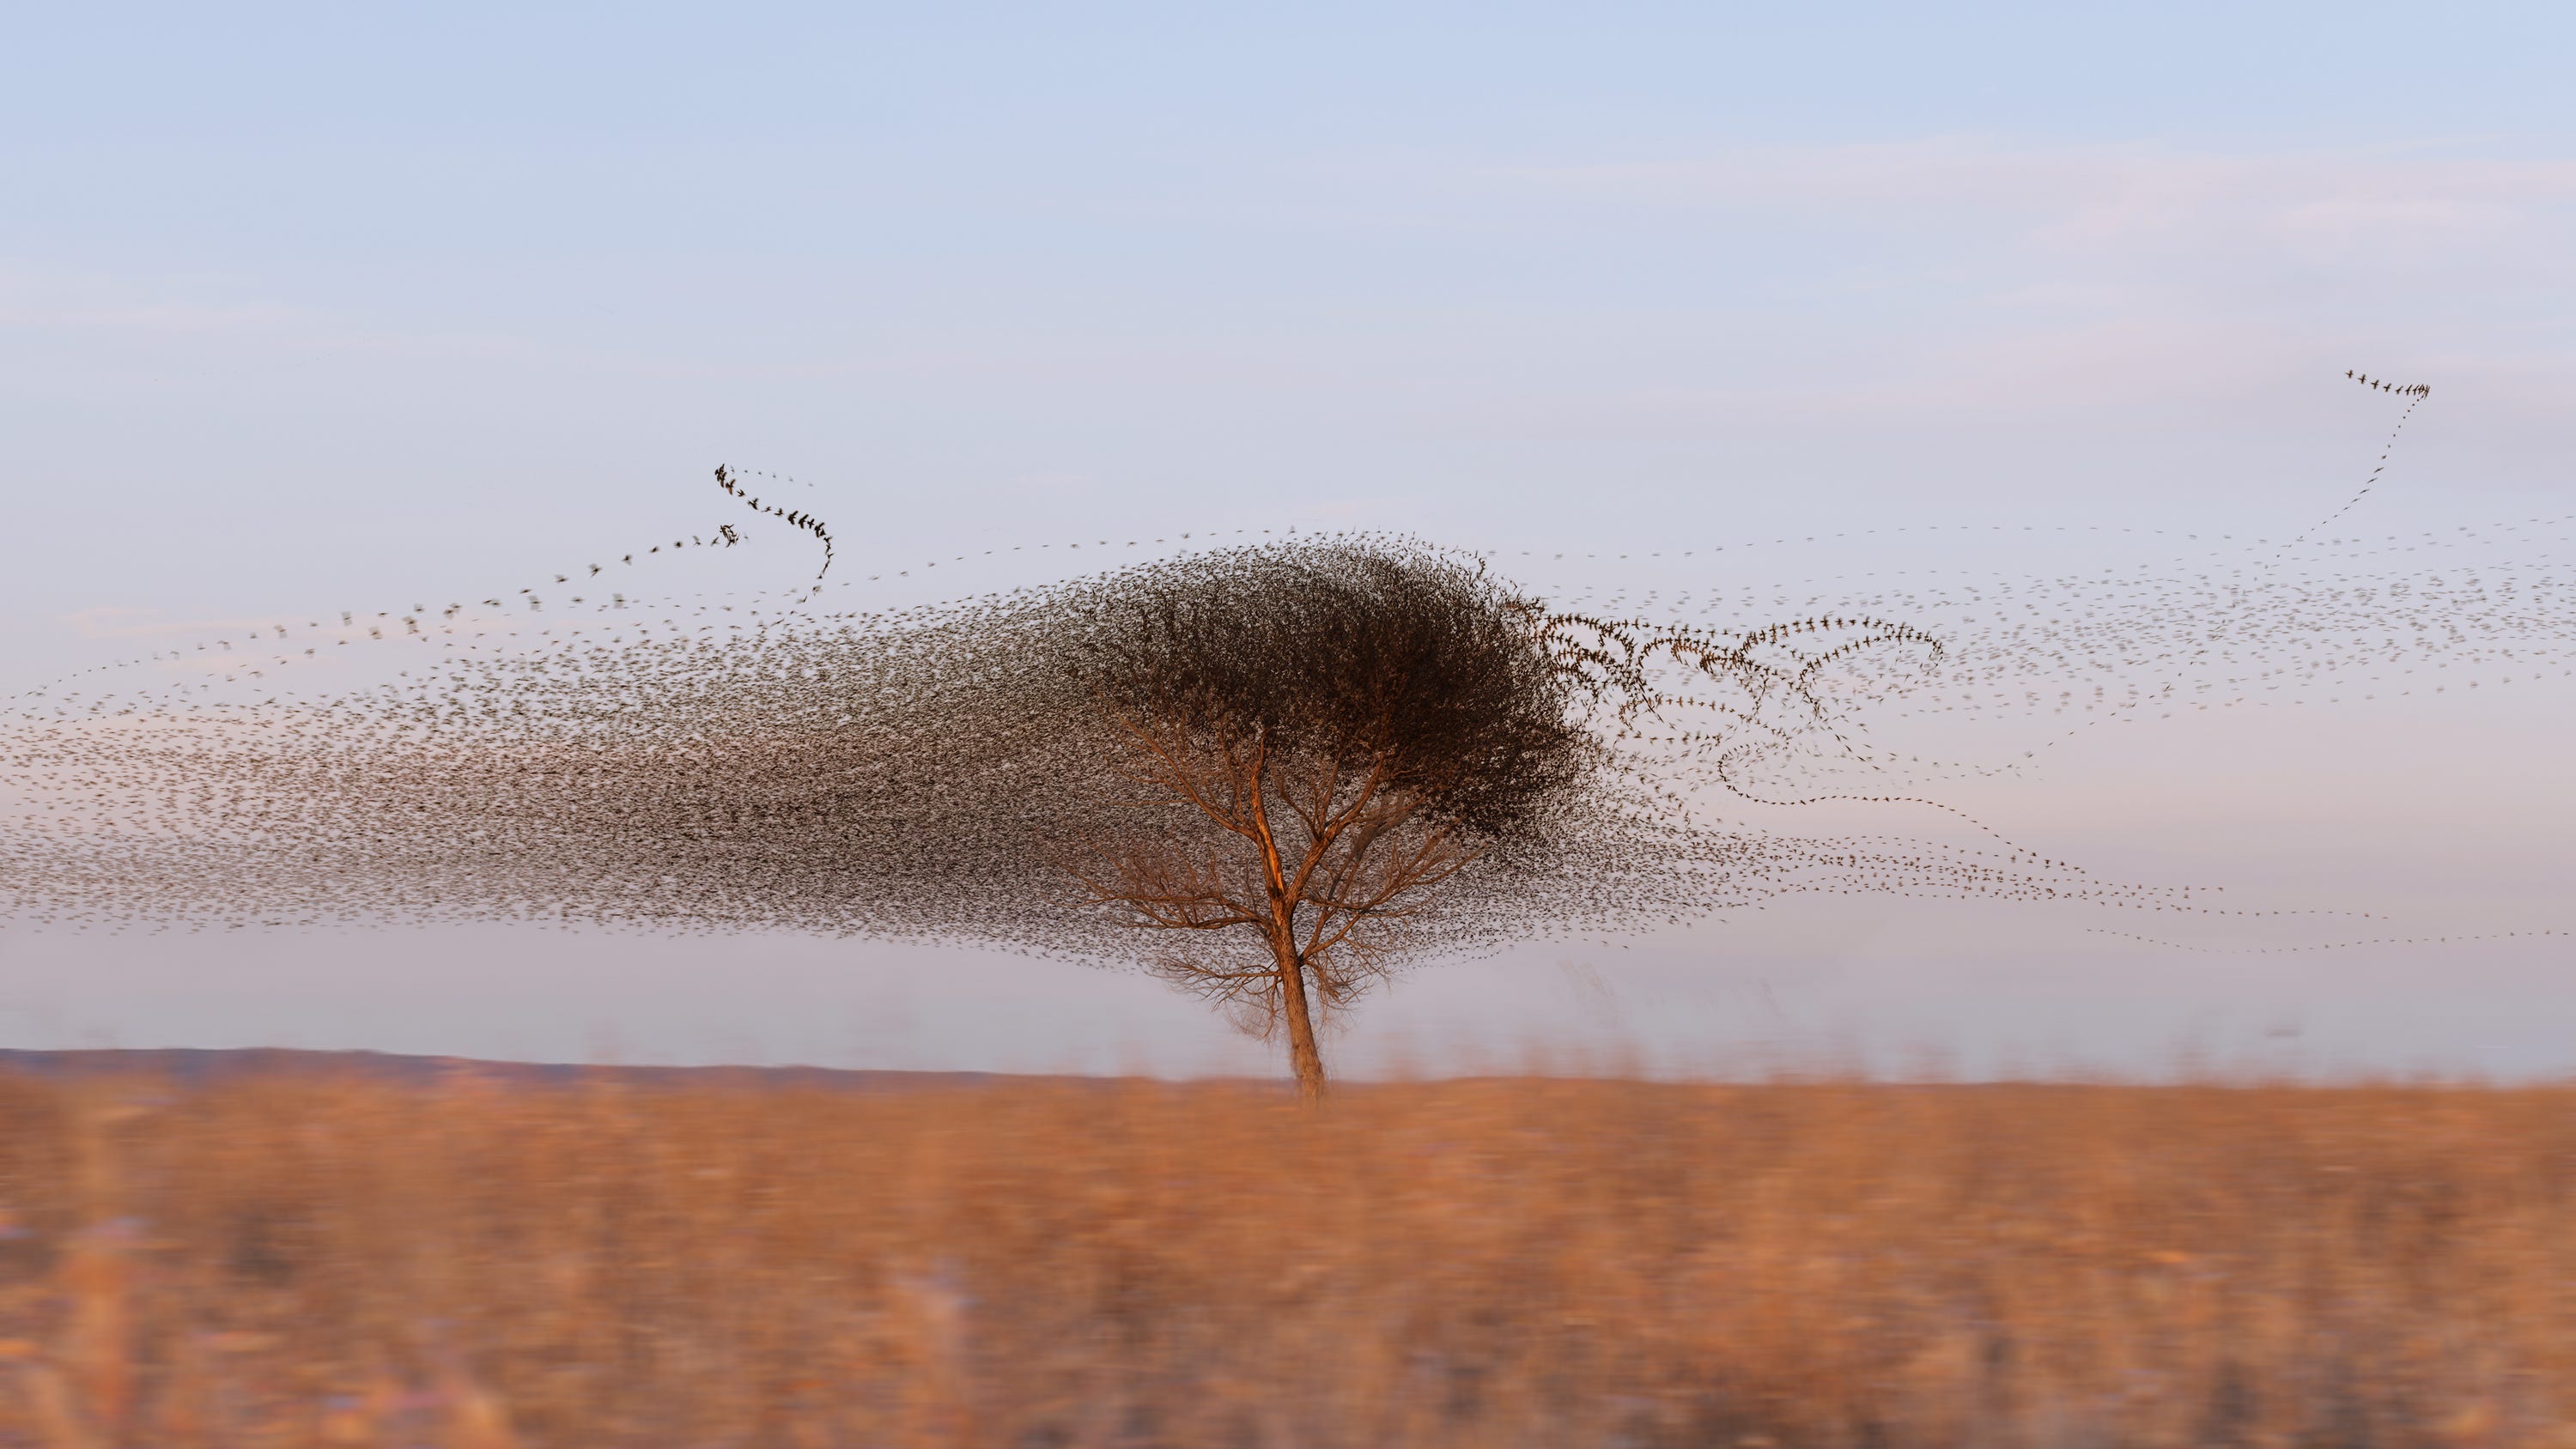
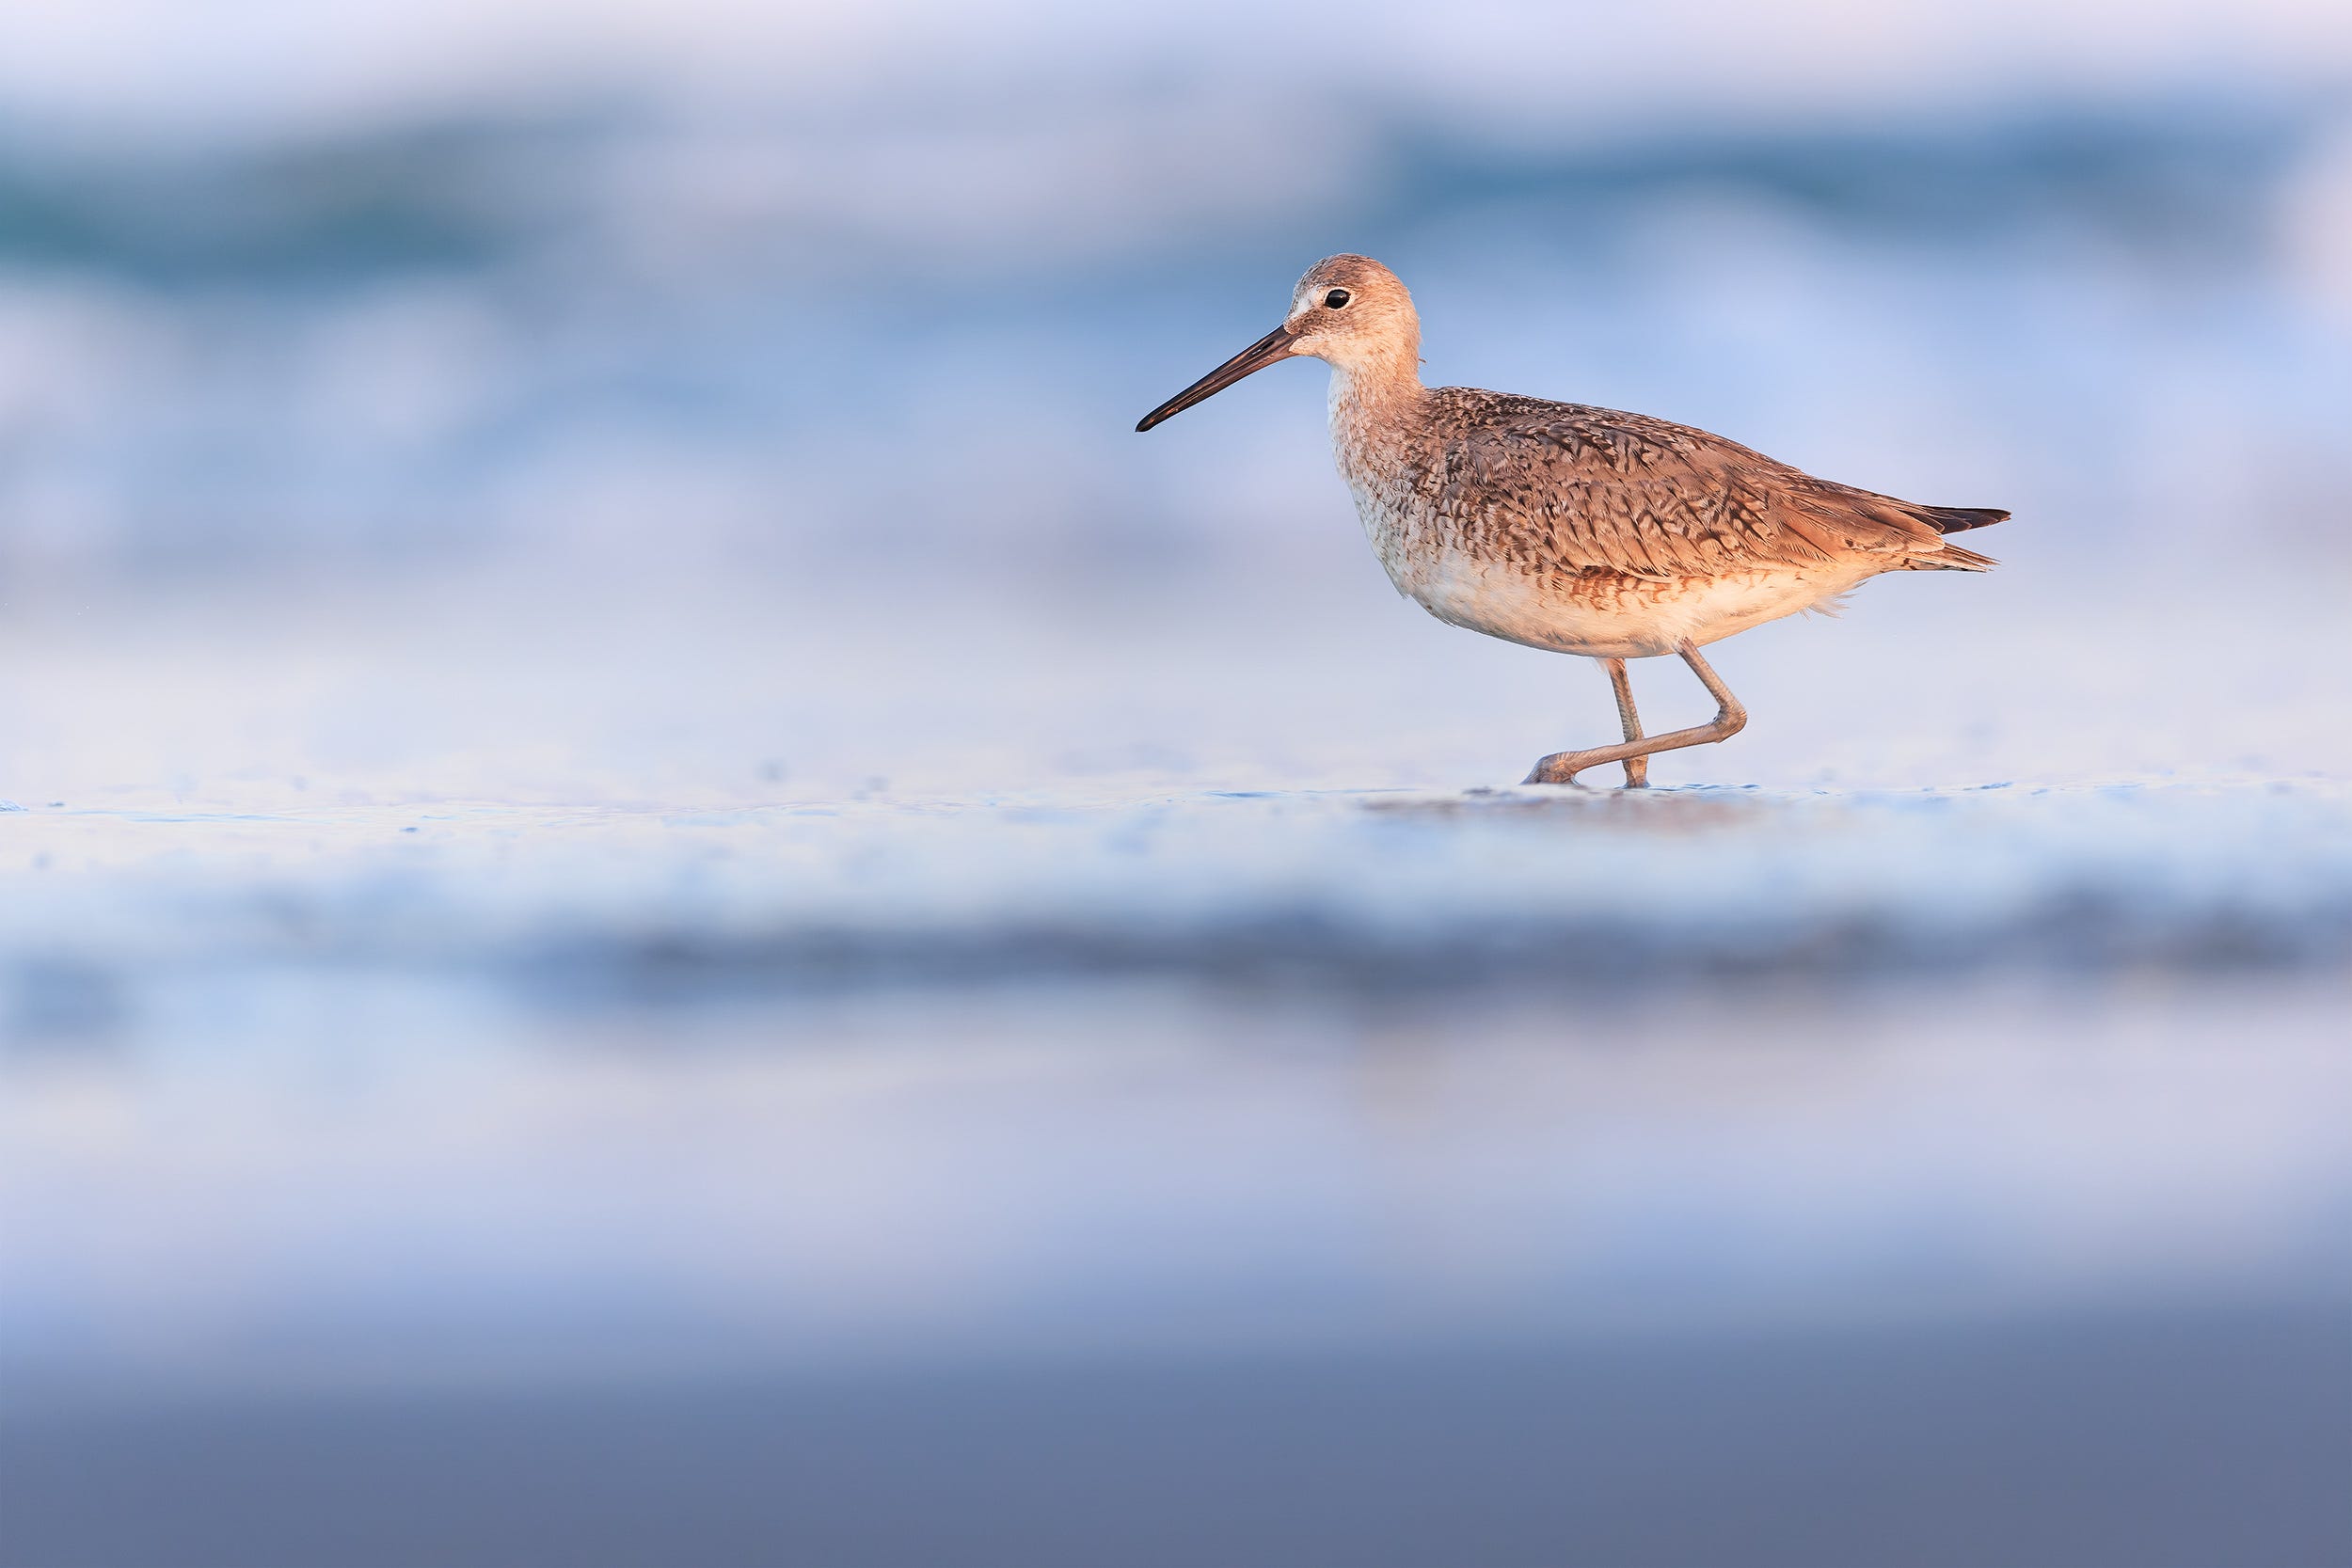
Without a doubt, one of the primary draws to birding is the chance to experience the beauty, variety, and fascinating behaviors of this unique class of animals. There’s nothing quite like your first good look at a Scarlet Tanager singing from the treetops of a northern hardwood forest, or a Swallow-tailed Kite effortlessly plucking a dragonfly from the sky. Moments like these are powerful—and often fleeting.
It’s no surprise, then, that many birders turn to photography as a way to capture and revisit those experiences. A camera offers the chance to preserve what might otherwise last only seconds.
At the same time, bird photography can feel just as overwhelming as scanning a mudflat packed with shorebirds in the Boreal autumn. Gear options are complex, price tags can be intimidating, and opinions on ethics vary widely. For many, that combination is enough to create hesitation before even getting started.
This guide is designed to simplify the process. We’ll break down the basics of bird photography, from why you might want to photograph birds in the first place to the gear that fits your goals, the ethics that guide responsible practice, and the steps to begin confidently in the field.
Why Photograph Birds?
While many bird photographers take pictures simply for their own enjoyment, bird photography can extend far beyond that. A camera can become a powerful tool—helping with identification, contributing to research, and creating compelling imagery that supports conservation.
Personal enjoyment — This is where most people land. Photography adds another layer to birding, giving beginners a way to capture the excitement of new species and offering seasoned birders a fresh challenge—even in places they’ve visited hundreds of times.
Identification support — Birding is often relaxing—but it also includes moments of uncertainty. Distant views, poor lighting, or brief encounters can make identification difficult. A camera helps bridge that gap. Reviewing images later allows you to study field marks, plumage details, and structure more closely, often revealing features you missed in the moment. Even familiar species can surprise you when viewed through this more detailed lens.
Research value — Photography also contributes to data collection. At migration sites such as hawkwatches, images can help confirm identifications of distant birds, supporting long-term monitoring efforts. In research settings, photographs of birds in hand are often used to document plumage variation or refine aging criteria. What may seem like a simple photo can contribute to a much larger scientific picture.
Art & conservation — Imagery is one of the most effective ways to connect people to birds. A striking photograph can spark curiosity, communicate the importance of a species or habitat, and inspire support for conservation. People are far more likely to care about what they can see and feel—and photography helps make that connection possible.
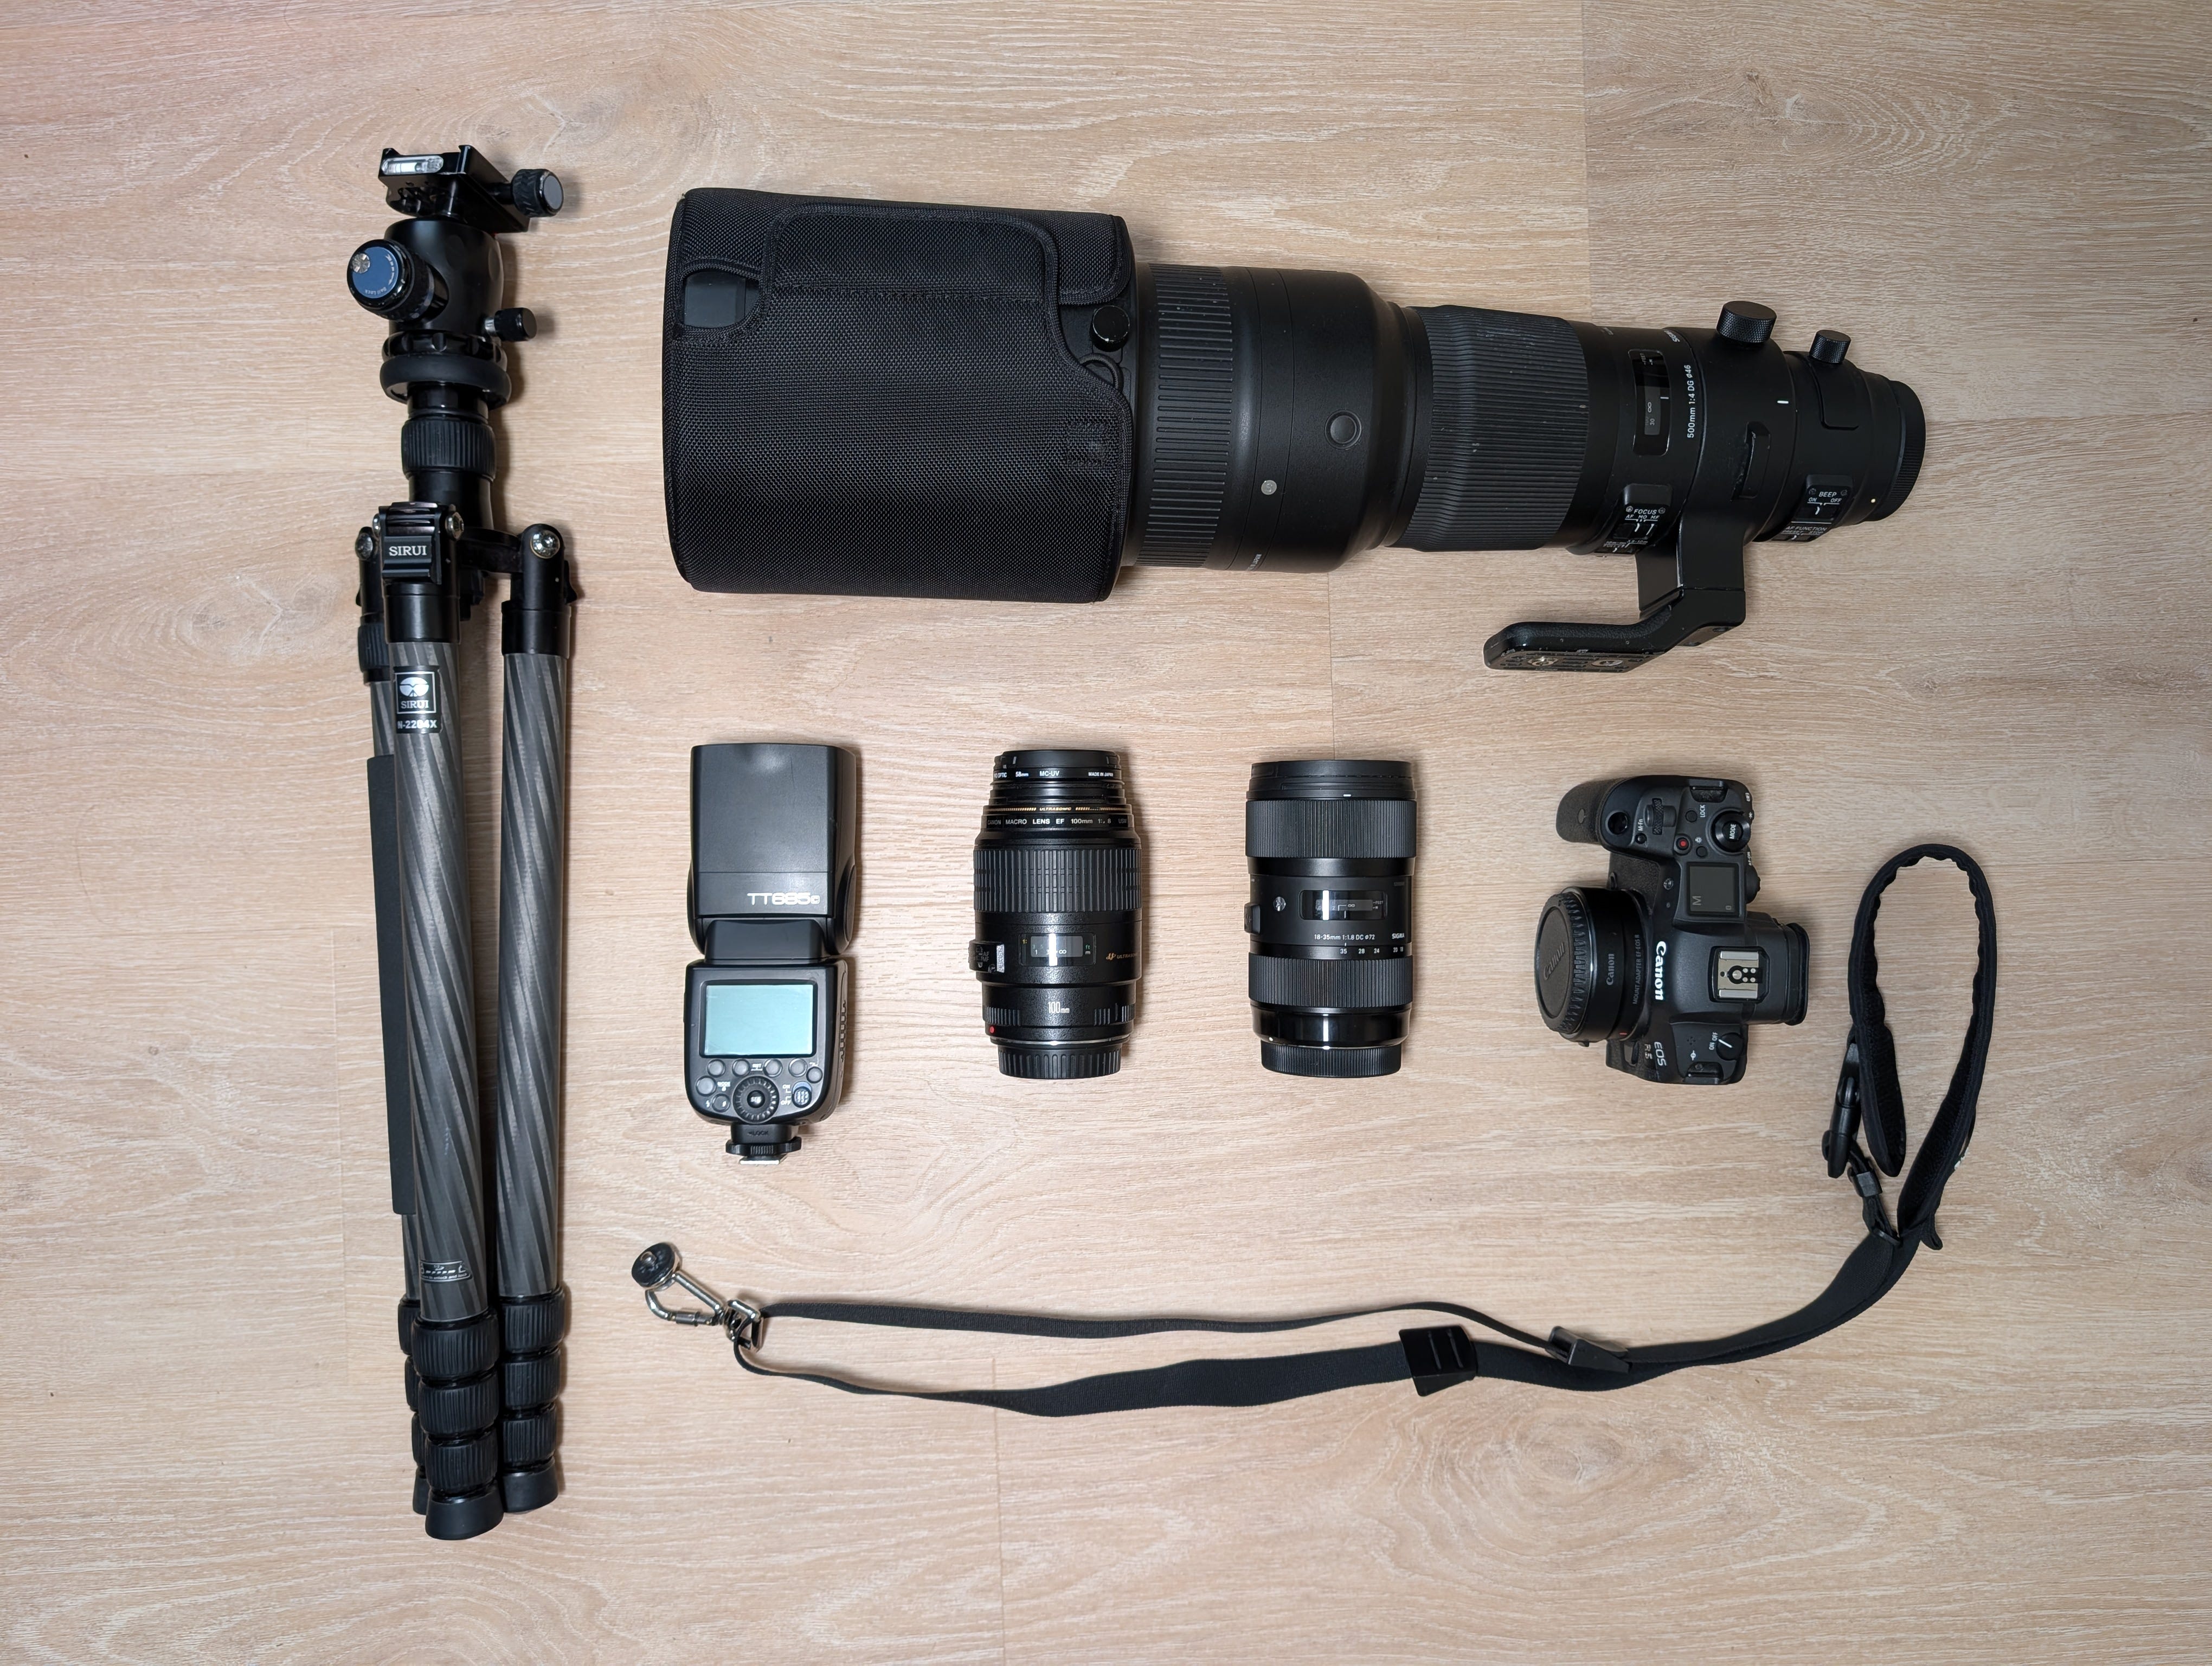
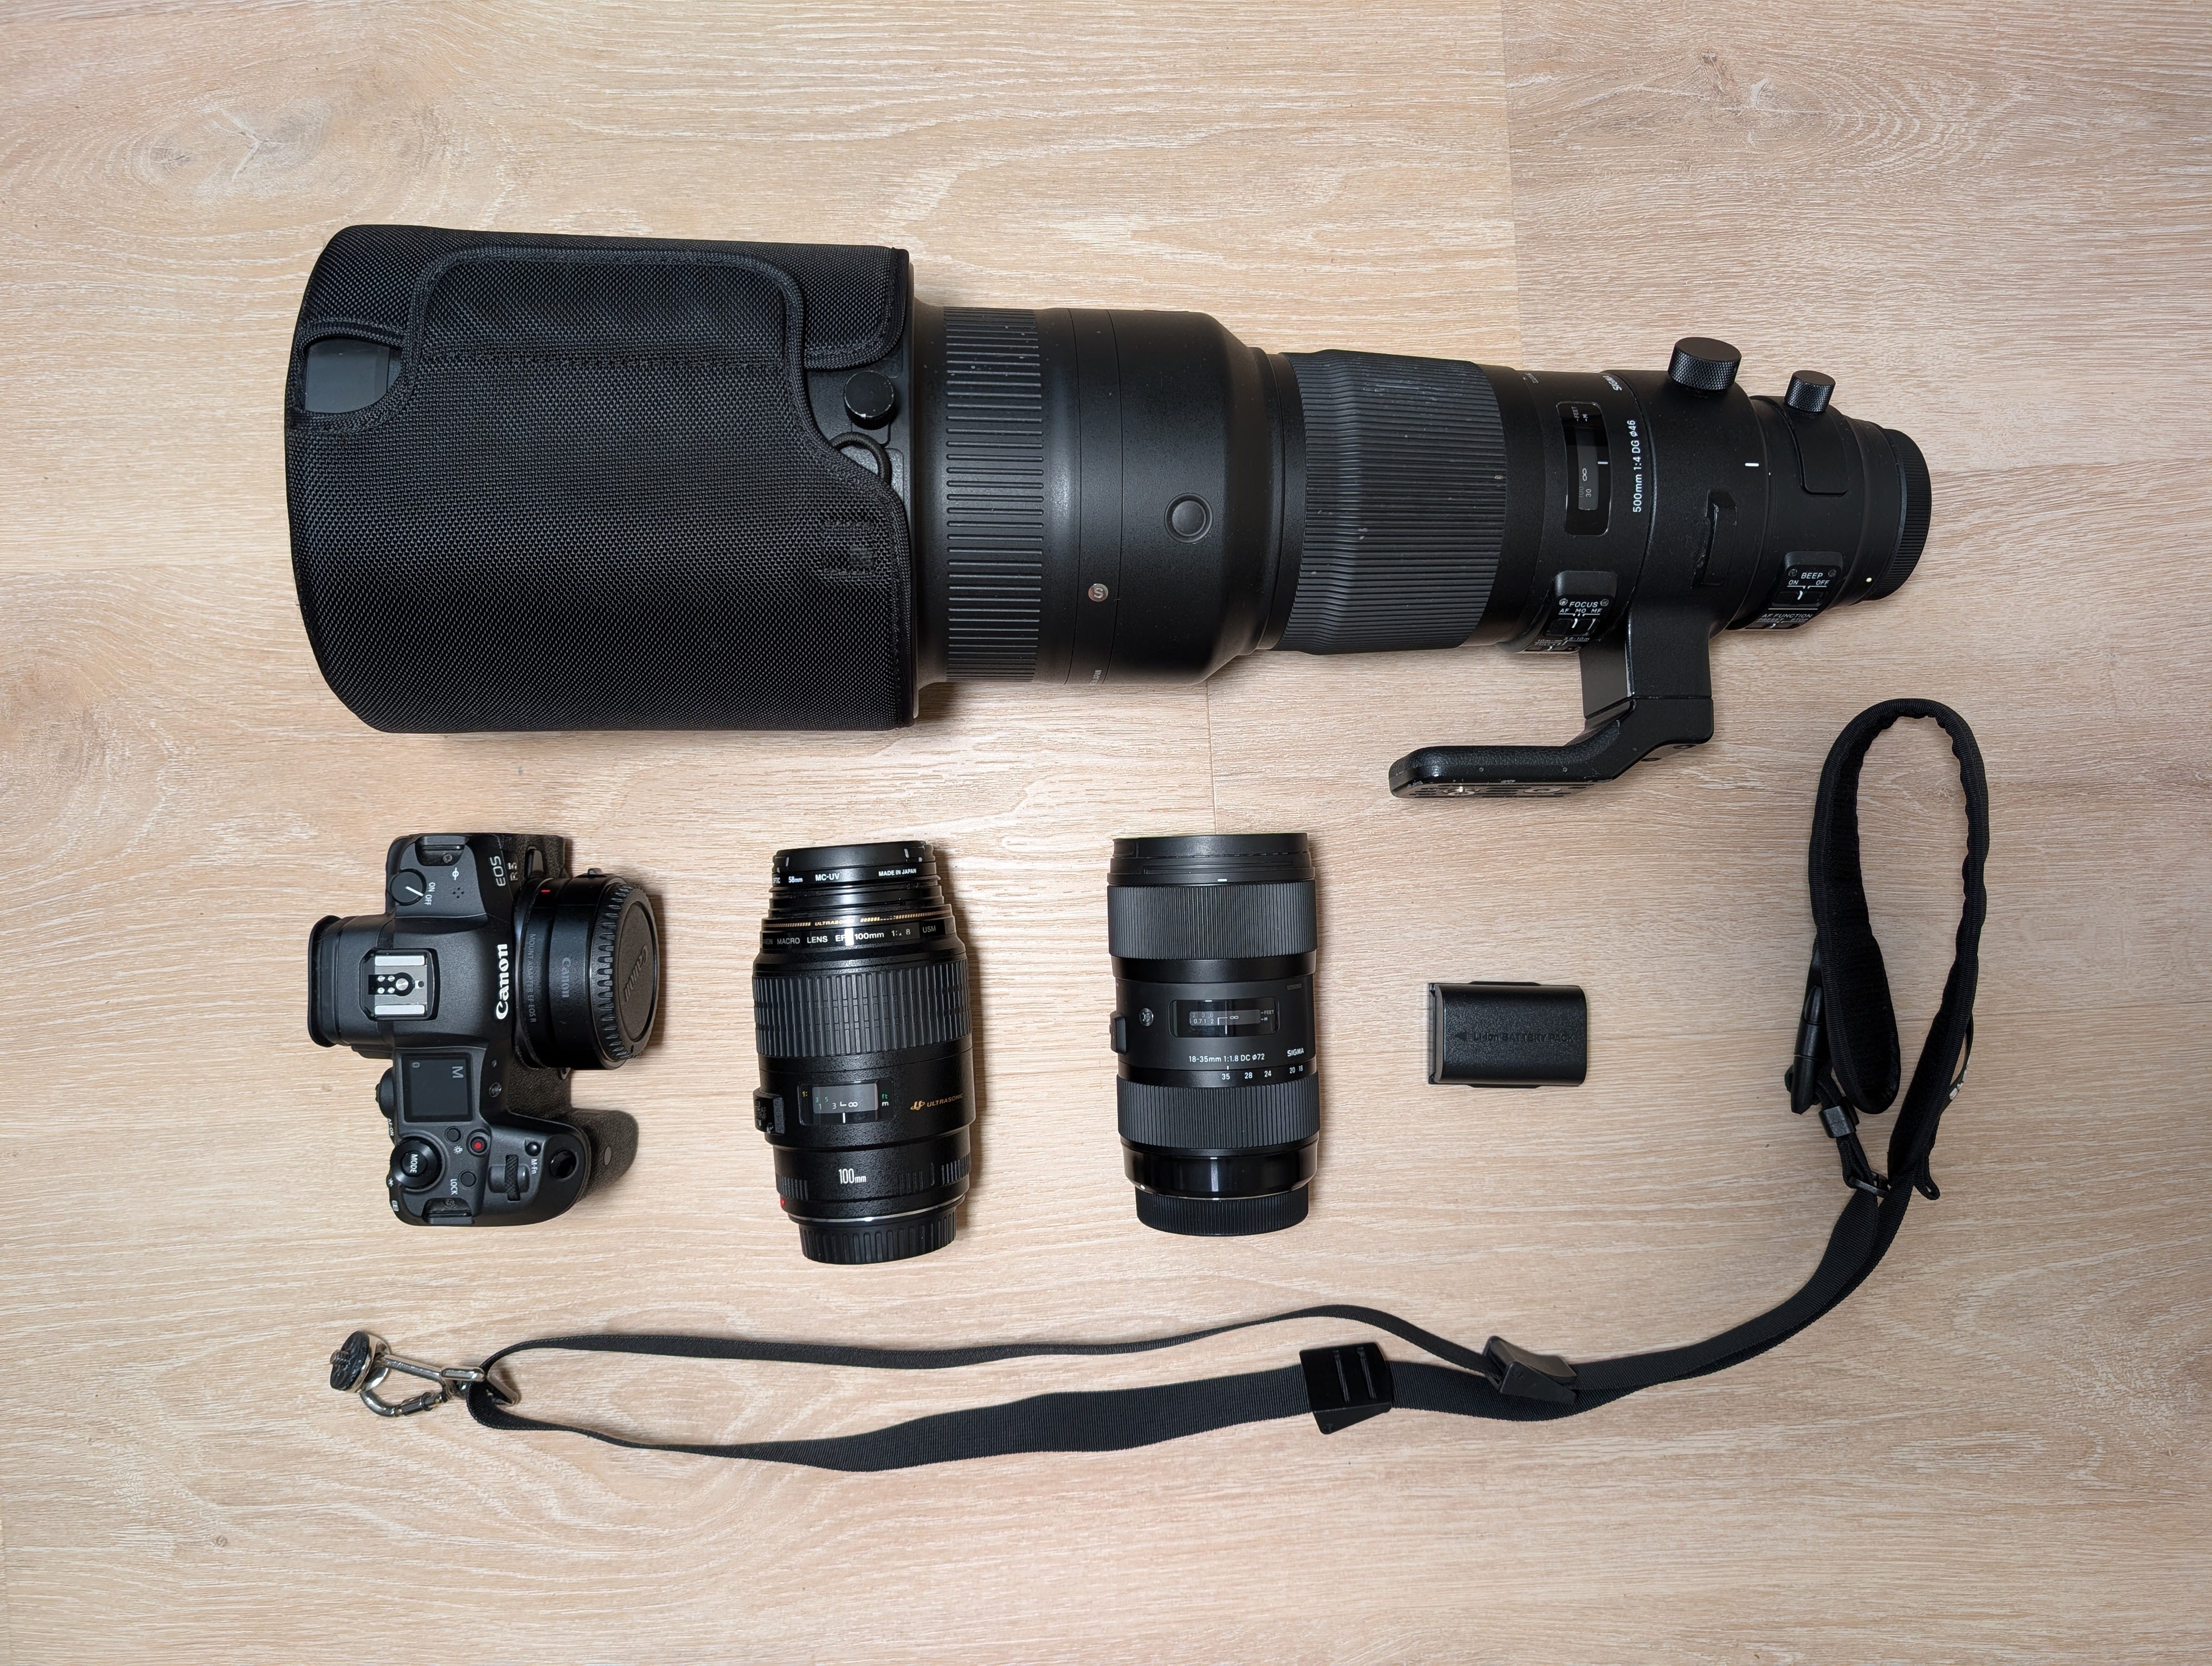
Gear
When it comes to choosing a camera, many people feel overwhelmed—and understandably so. With so many brands, technical terms, and price ranges, picking the right setup as a beginner can feel like an impossible task.
Before diving into gear, it helps to define a few key things:
Price – Setting a budget will immediately shape your options. Photography is not necessarily a cheap hobby, and while there are options across a wide range of prices ($400 - $20,000 USD), knowing what you’re willing to spend will naturally narrow the field and help you avoid unnecessary confusion.
Personal goals / intended use – This is just as important. If your goal is to document what you see or to help with identification, your ideal setup will look very different from that of someone aiming to produce high-level artistic images. Having a clear sense of purpose is essential—and remember, most gear can be upgraded over time.
Once you’ve thought through these, you can start exploring specific camera types.
Camera Bodies
For bird photography, we’ll focus on three main categories: DSLRs, mirrorless cameras, and bridge cameras. Examples at different price points will be provided for each category, according to the following tiers: Tier 1 (<$1,000), Tier 2 ($1,000 - $3,000), and Tier 3 (> $3,000).
DSLR (Digital Single-Lens Reflex)
DSLRs are the classic professional-style cameras with interchangeable lenses. Until recently, they were the dominant choice for both professionals and serious hobbyists, though mirrorless systems are now becoming more common.
DSLRs come in a wide range of specifications and price points, making them a solid entry point into photography with plenty of room to upgrade later. They produce excellent image quality, but generally lack some of the newer technologies found in mirrorless systems, such as advanced subject tracking and real-time exposure previews.
DSLRs will suit those interested in pursuing bird photography for any of the reasons mentioned earlier.
Tier 1 - Canon EOS Rebel T7, Nikon D7500
Tier 2 - Canon EOS 5D Mark IV, Nikon D850
Tier 3 - Canon EOS 1DX Mark III, Nikon D6
Mirrorless
Mirrorless cameras remove the internal mirror system found in DSLRs. Instead of an optical view through a mirror and prism, they use a digital electronic viewfinder (or rear screen) to display the image directly from the sensor.
Removing the mirror allows for smaller bodies, faster continuous shooting, and often completely silent shooting (since there’s no mirror mechanism flipping up and down). Many modern mirrorless cameras also feature advanced autofocus and tracking systems, which are especially useful for wildlife photography.
While mirrorless cameras boast impressive technology, they still come with a few drawbacks worth considering. Packing advanced features into increasingly compact bodies creates more potential points of failure—particularly in harsh field conditions. In extreme temperatures or high moisture, some mirrorless cameras may overheat or temporarily lock up, preventing the shutter from firing, while more bare-bones DSLRs often continue operating without issue.
Another consideration is the rolling shutter used by most mirrorless cameras. Rather than capturing the entire image at once, the sensor records data line by line from top to bottom. The delay is only a fraction of a second and is unnoticeable in nearly all situations, but it can occasionally appear during extremely fast motion. A bird in flight may show a slightly distorted wing shape, or a heron striking at a fish may appear to have a curved bill. In practice, mirrorless cameras still perform exceptionally well for bird photography—including action shots—but rolling shutter distortion can be a limitation in certain situations.
Photographers transitioning from DSLRs should also consider lens compatibility. Even within the same brand, DSLR lenses typically do not mount directly onto mirrorless bodies. Adapters help bridge this gap, but quality matters. Basic adapters may allow the lens to fit mechanically while sacrificing autofocus or aperture control, whereas manufacturer-made adapters usually preserve full functionality. Those higher-end adapters, however, often add another couple of hundred dollars to the total cost of a setup.
Cost remains one of the most common barriers to entry. High-end mirrorless bodies can be extremely expensive even before adding lenses. Still, many companies now offer entry-level and mid-range options that provide an accessible starting point and room to grow within the system over time.
Mirrorless cameras would also be a great choice for any bird photographer, but they can be overkill for those only looking to capture documentation shots. Mirrorless cameras may be a better bet for the heavily invested photographer who will be making the most of every advanced feature.
Tier 2 - Canon EOS R7, Sony a6700
Tier 3 - Canon EOS R5, Nikon Z9, Sony a7R V
Bridge Cameras
Bridge cameras sit at the high end of the “point-and-shoot” category. They feature fixed, built-in lenses but offer powerful zoom ranges and improved image quality compared to basic compact cameras.
These are a great option for beginners who want to document wildlife or assist with identification, perfect for documentation shots that still produce strong images. However, they are not ideal for long-term system building, as upgrading typically requires replacing the entire camera rather than just the lens.
Tier 1 - Canon PowerShot SX740 HS, Nikon COOLPIX P950, Panasonic LUMIX FZ80D, Minolta MN40Z
Lens Considerations
Now let’s look at lenses, which play a major role in both image quality and cost. These factors primarily apply to DSLRs and mirrorless systems, though some bridge camera concepts overlap.
Focal Length
Focal length determines how “zoomed in” your image appears and is especially important in bird photography.
While wide-angle focal lengths (around 24–100mm) can produce beautiful environmental shots, most bird photographers need a much longer reach. For typical bird photography, a focal length in the 400–600mm range is ideal for capturing detailed images of distant subjects. In addition to lenses, teleconverters are a possible asset to consider. These are magnifying glasses that mount between your camera and lens to multiply your focal length, often by 1.4x or 2x. This is a much cheaper option than buying a whole new lens, as they can be found for $300-$700, but they have a couple of key drawbacks. Not only do they multiply your focal length, but they also multiply your maximum aperture, reducing the amount of light reaching your camera sensor. Additionally, they tend to degrade image quality and slightly soften focus. The degree to which this happens varies a lot depending on camera and lens combos, so it’s best to do some research specific to your setup before considering this option.
Zoom vs. Prime
Zoom lenses cover a range of focal lengths, while prime lenses have a fixed focal length, such as 400mm.
Zoom lenses are often more affordable and highly versatile, making them an excellent choice for beginners. They allow you to experiment with composition and better understand your preferred shooting style.
Prime lenses, while less flexible, often deliver superior image quality and wider maximum apertures—but at a significantly higher cost. They are best suited for photographers who are more specialized or looking for the highest possible optical performance.
Aperture
Aperture (written as f/number, or “f-stop”) is one of the most important lens characteristics. It affects depth-of-field control, low-light performance, and price.
Smaller f-numbers (e.g., f/4) indicate a wider aperture, which allows more light into the camera. This results in better performance in low-light conditions, faster shutter speeds, and a shallower depth of field (more background blur). These benefits typically come at a higher cost.
For zoom lenses, the maximum aperture often changes as you zoom in. For example, a lens might be f/5.6 at the wide end and f/6.3 at full zoom.
There’s no real downside to having a wider maximum aperture—only cost—so it mainly comes down to budget.
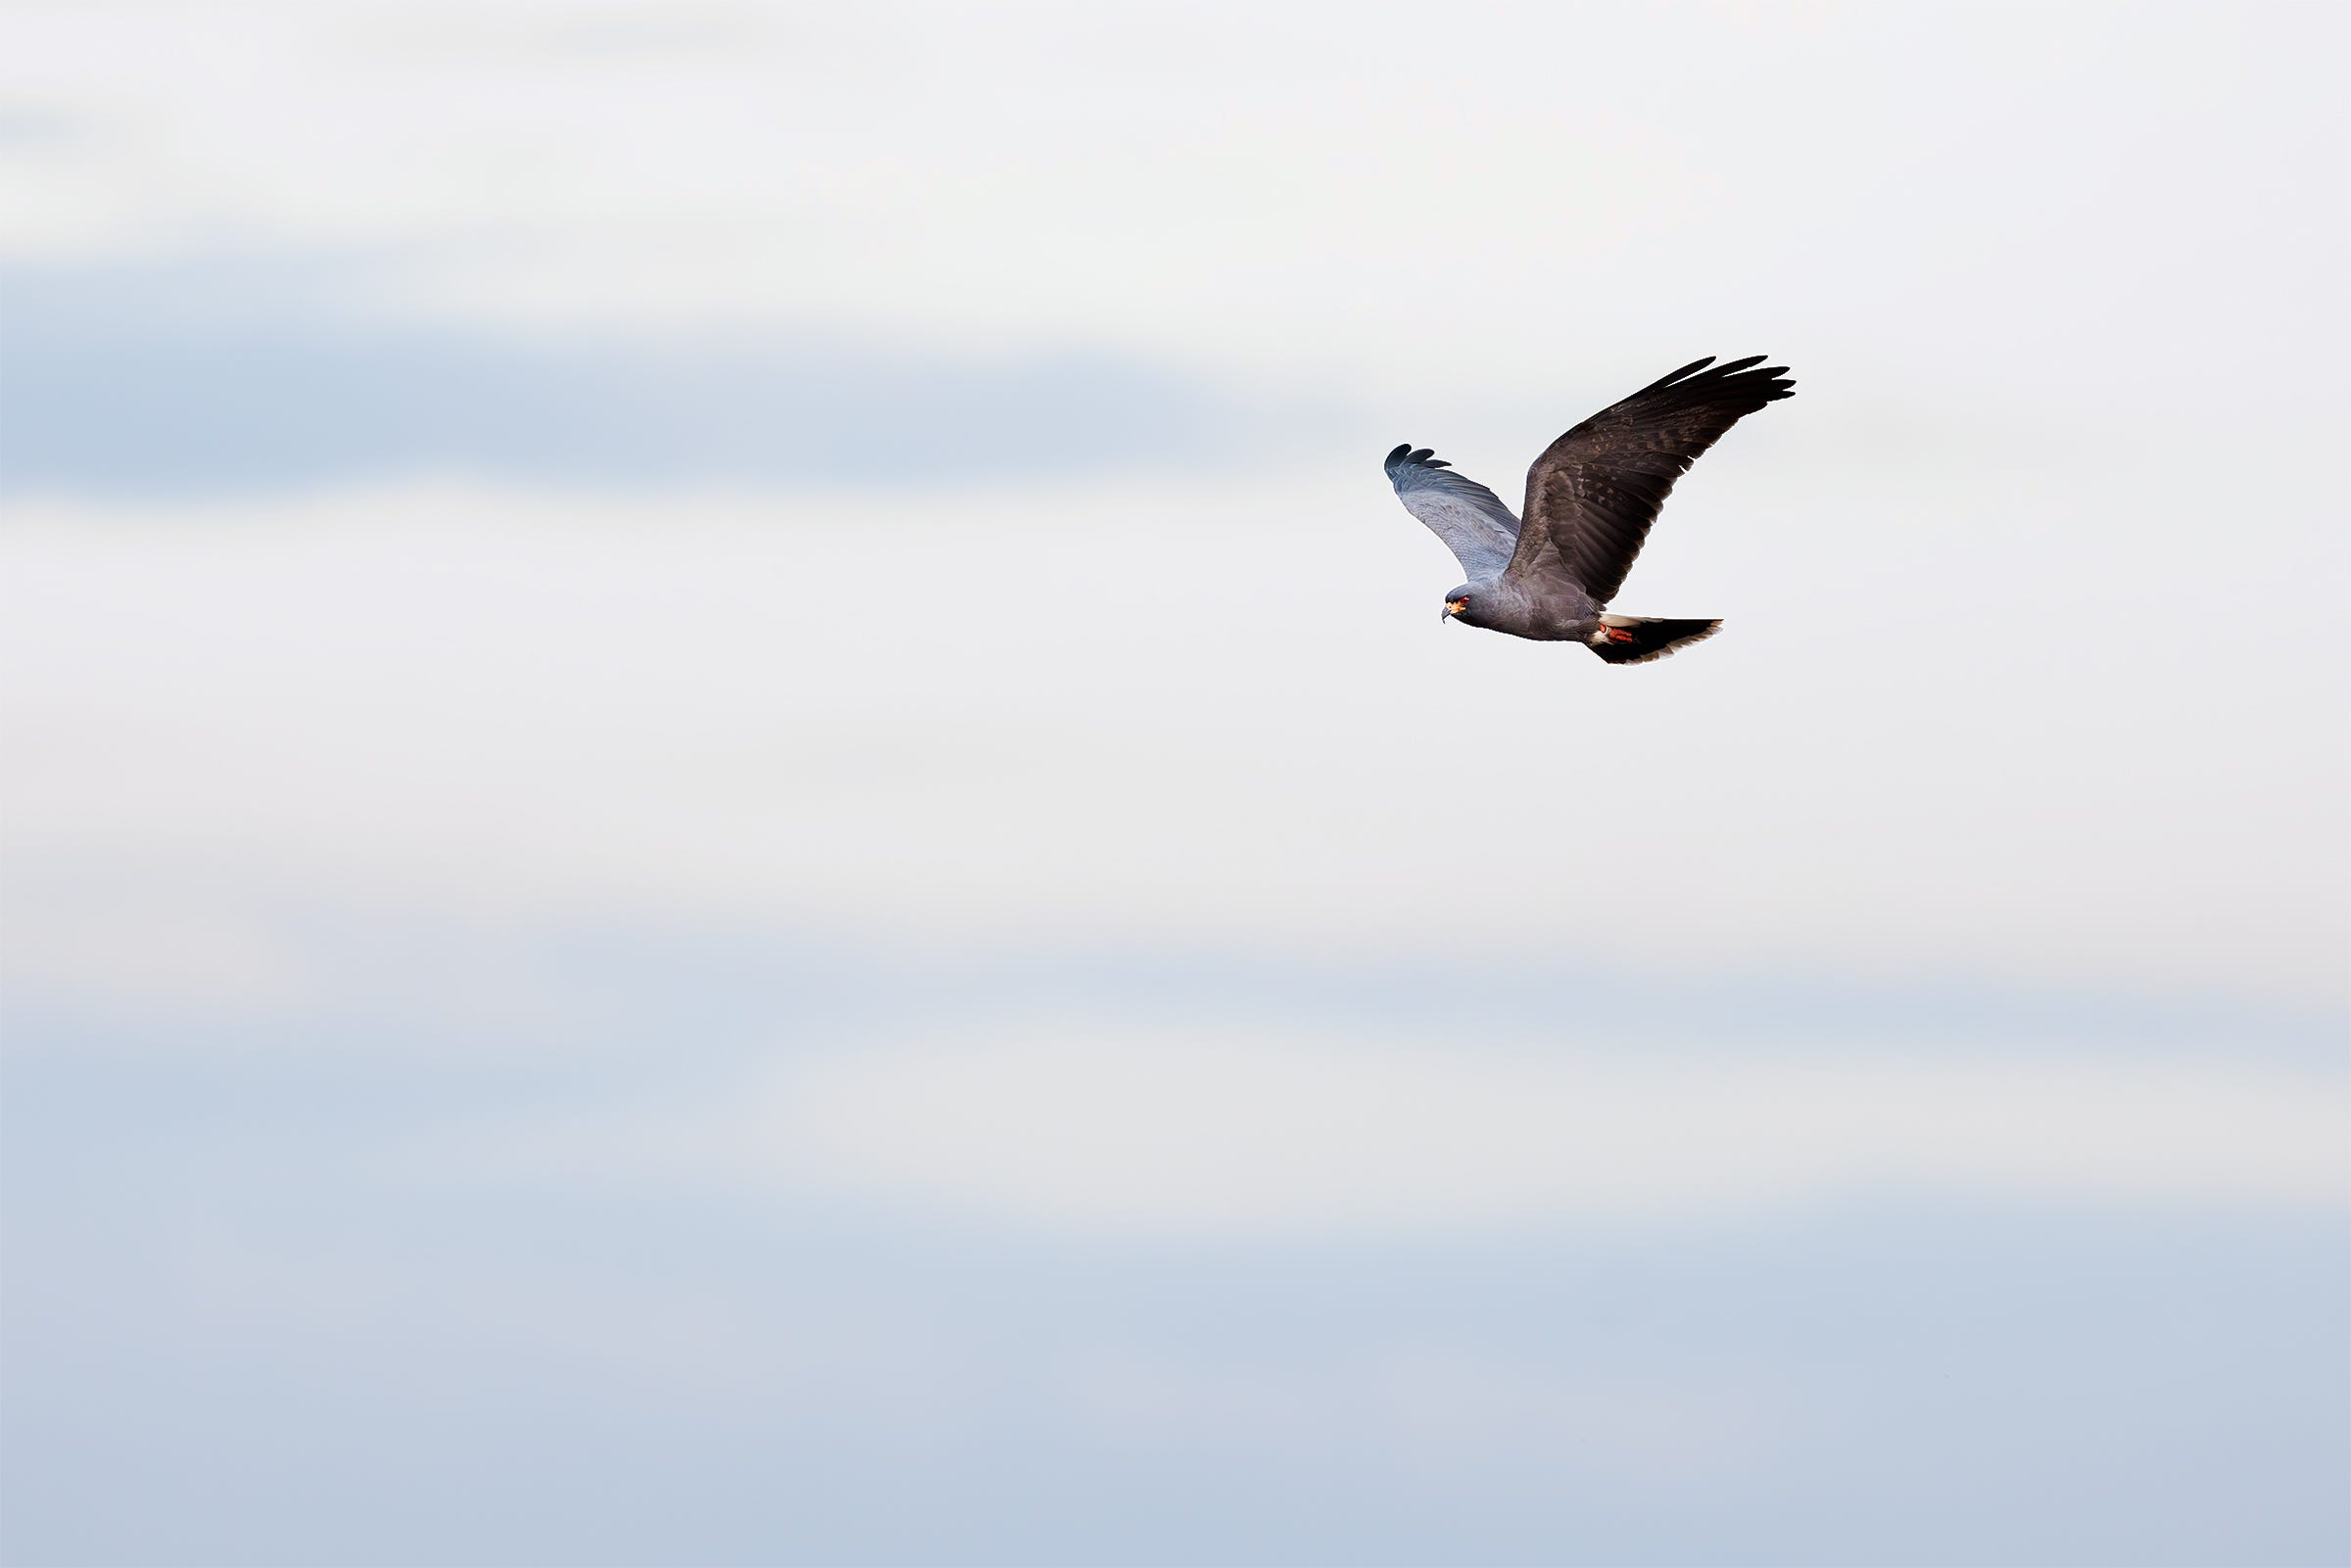
In the Field
Now that the intimidating part is complete and the investment is made, it’s time to get some use out of your gear! While there is absolutely nothing wrong with setting your camera to auto and snapping pics during your normal birding outings, we’ll cover a few techniques to step up your photography.
First, for those serious about getting the most out of their equipment, please take some time to learn how it works. This is a slow process to become fluent in the language of photography, but you will not regret it! Evenings in your backyard or even indoors are a great place to start. Please set your camera to manual and experiment to learn the result. YouTube can be a great resource for learning, too! Creators such as Ray Hennessy and Jan Wegener supply instructional videos on field technique, camera settings, and editing functions.
For this introduction to photography, we’ll cover the three main settings that work together to create a proper exposure:
Shutter speed – The shutter speed indicates the amount of time (in seconds) that the camera sensor is exposed. Of course, a fast shutter speed lets in less light than a slower one. It also affects factors such as motion blur. A simple rule to mitigate motion blur is to match your focal length to the inverse of your shutter speed. For instance, at 400mm, aim to keep your shutter speed at 1/400 second or faster.
Aperture – As discussed earlier, one of the key elements it affects is light. Adjusting the aperture changes the diameter of the diaphragm blades within the lens. Think of it as your pupil. When it’s dark, it needs to dilate to let more light in. This is done by making your f-stop a smaller number. Personally, I like to keep my camera set to the maximum aperture (smallest f-stop number) and play around with the other two settings listed to achieve proper exposure. Of course, there are exceptions to this rule, but it’s a fine place to start when learning!
ISO – The ISO amplifies the amount of light hitting your camera sensor. A lower number indicates less amplification and thus a darker image. One key thing to keep in mind when adjusting ISO is its effect on image quality. High amplification levels (generally ISO of 1600 or greater) can produce noisy (or grainy) images. The point at which ISO starts to degrade image quality changes drastically between camera bodies, so playing around with this to decide for yourself may be in order.
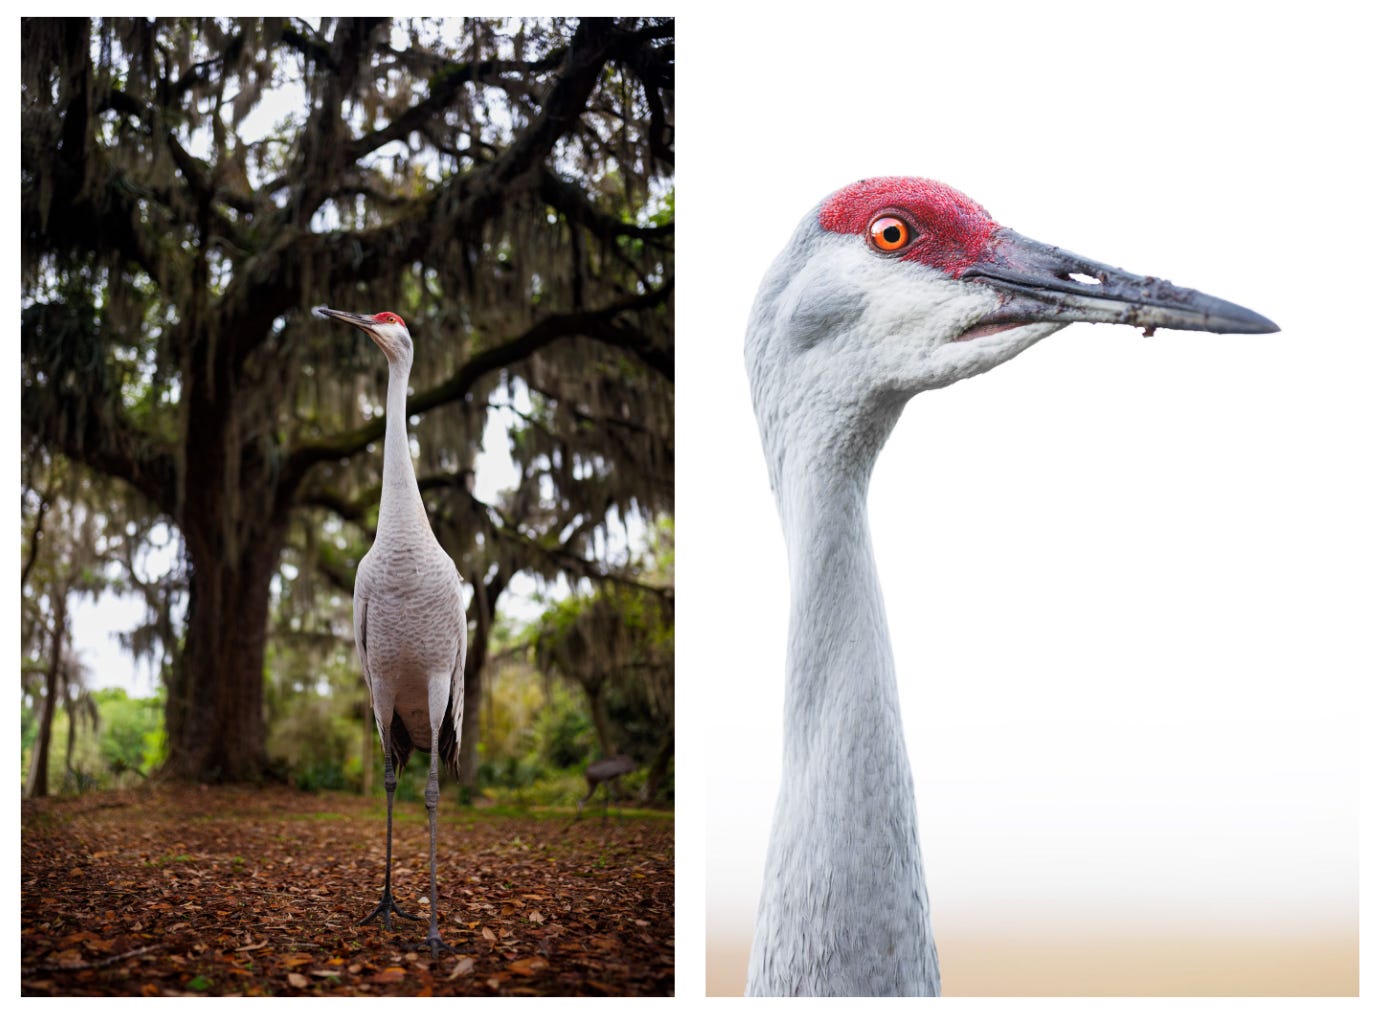
With those technical skills covered, it’s time to start thinking about strategic approaches to bettering your images. Similar to birding, understanding the behaviors, habitat preferences, and vocalizations of your targets is extremely beneficial for capturing a good image. The strategy for bird photography differs from that for birding in a few ways.
Location selection is a significant, often-overlooked aspect of photography that can differ significantly from that in birding. Some areas that are fantastic for birding may not be ideal for photography. For instance, some birding/wildlife drives may host impressive numbers of species, but views are typically restricted to distant looks. Additionally, the flexibility of vantage points may be largely restricted in an area like this. While inconsequential for birding, simply moving a few feet in any direction can drastically change the composition of an image.
Another thing to keep in mind with photography is the amount of time you spend with a subject. Often, it can be very beneficial to hang out in one area or with one bird for an extended period. Allowing your subject to get used to you without pursuing it often leads to closer encounters and more interesting behaviors being captured. Birds are creatures of habit, so take note of favored perches or heavily used areas as they will often return!
Ethics
As we discuss bird photography strategy, it’s important to address ethical considerations. This is quite a hot topic that could cover its own entire article, so we’ll keep it brief for now. Like birding, photography can become quite addictive, and it’s easy to get carried away. After hours, days, or even weeks of trying to capture a specific image, you may find yourself pressing harder to get the shot. Two areas in particular where this comes into play are the use of playback – or playing recordings of bird vocalizations to draw a species closer – and the pursuit of a sensitive species.
Playback has become a highly polarizing topic, with numerous perspectives. Having used playback across multiple avian research and conservation projects, this information stems from a strong familiarity with its effects. Ultimately, we align with the American Birding Association’s Code of Ethics, which encourages the limited use of playback.
Species – Birds may vary immensely in their responsiveness to playback, depending on species and even on the individual. For some, it may be a casual response that has no lasting effects. Still, for others, it could spark a highly aggressive reaction, continuing to provoke the bird and drawing it away from other necessary duties for many minutes or more after the playback has stopped.
Time of year – It is important to consider the time of year, as birds will react quite differently depending on their territorial status. Birds setting up a territory or currently defending one for the breeding season often respond strongly to playback. This will pull them away from the important task of tending to a nest and unnecessarily increase their cortisol during an already stressful time of year. Never use playback during the breeding season.
Location – Of course, some areas get hundreds of birders and photographers every day, while others get none. Consider whether your subject may be being pressed by other photographers throughout the day. Duration – You don’t have to be a biologist to know that the amount of time an individual is exposed to playback may affect its long-term consequences. However, from a biologist’s perspective, playback used in avian research is strictly regulated by species in terms of duration. Sometimes the better choice is simply finding a quieter place. Both you and the birds will appreciate the solitude.
Call Type – Perhaps less obviously, birds vary their songs and calls, which can mean different things. Some songs may elicit an aggressive response, while others may only draw out a distant counter-song. A basic “chip” note, a basic call, often produces the least aggressive approach, while non-standard songs may be the most agitating.
When it comes to pursuing birds, many of the same factors apply. Here are a couple of different things to think about:
Flushing – While flushing a bird is never the goal, it will inevitably happen accidentally. The harm comes when it is done intentionally or, even unintentionally, due to continued pressure. Even disregarding ethics, a bird that has flushed once is going to flush much more easily. So, if your goal is a closer picture, there is no point in continuing to chase a bird that has already flushed.
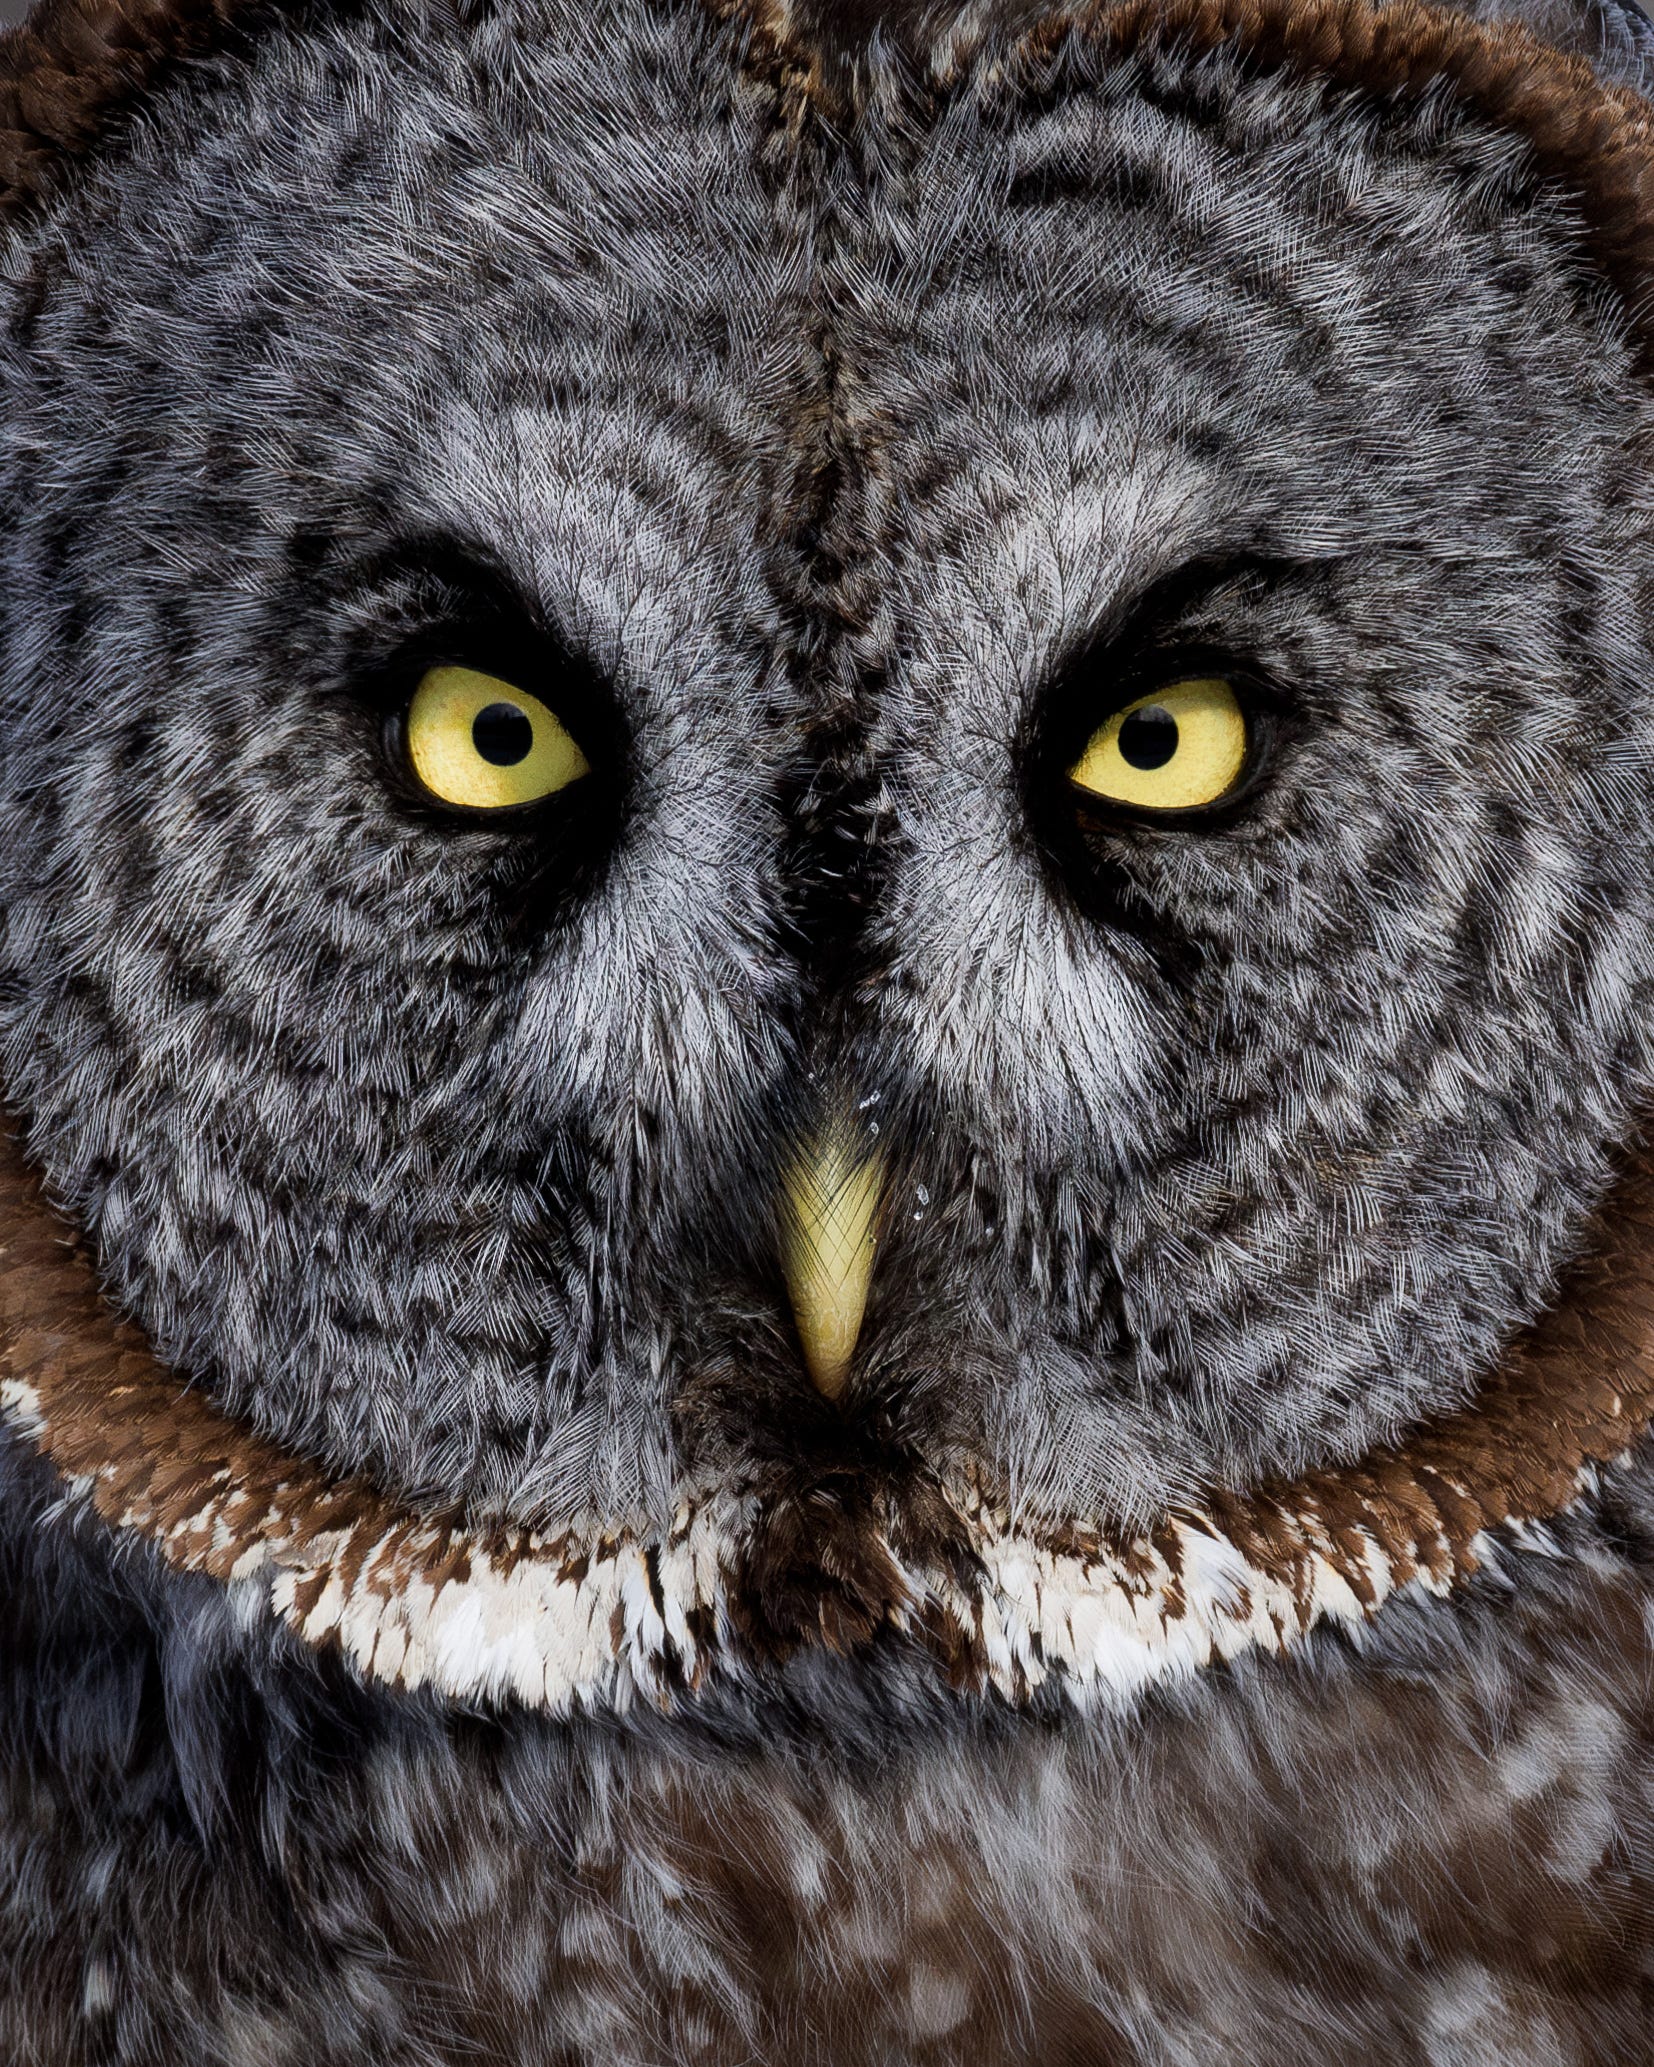
Rarities and raptors – This is where ethics become especially important. When an unusual bird—or a large, charismatic raptor such as an eagle or owl—appears, birders and photographers alike often flock to the area to observe or photograph it. These birds can quickly come under constant pressure, which is why “twitchable” birds should never be pursued aggressively or repeatedly called out in ways that increase disturbance.
The topic of ethics walks a fine line, becoming fuzzy when differing opinions are introduced. We hope this information can help you choose your own self-proclaimed best practice and maintain the health and appreciation for the birds. Don’t forget that their persistence and well-being are the only reasons you’re out there in the first place!
Final Reflection
Bird photography is an incredible way to observe, document, and share the beauty of the avian world. While some aspects of the craft can feel intimidating at first, we hope this article has provided a strong foundation and the confidence to begin capturing one of nature’s most remarkable subjects.
Bringing a camera into the field adds a new dimension to birding. It can deepen your connection to familiar local spots, reignite curiosity in places you’ve visited countless times, and reveal new details about species you thought you already knew well.
Most importantly, bird photography should remain enjoyable. Whether you’re chasing rare sightings or simply documenting the birds in your own backyard, we hope to see you out on the trail—smiling behind your camera.
What’s Next?
Don’t worry, this isn’t the last time that we’ll cover bird photography. We plan to launch an entire Bird Photography Study Series in the near future that will cover each of these elements in detail, from creating better shots under different conditions to creating more artistic images to tips for file management and image editing.
Phil Stollsteimer Photography
Phil Stollsteimer is an enthusiastic naturalist specializing in birds, reptiles, and amphibians. He is a primary contributing photographer to Birding University. He is dedicated to artistically showcasing wildlife through his work to inspire greater appreciation and conservation of the Earth’s natural world. When he is not behind the camera, Stollsteimer travels across the United States as a seasonal field biologist, studying bird populations in a variety of habitats.
To view more of his photography and ongoing projects, visit his website to explore his full collection.
 | A guest post by
|
Wow what a fantastic and informative piece!
It sure would be nice if you encouraged bird photographers to make some of their photos available to all by posting on Wikimedia with a CC BY SA 4.0 license. We need more photographs for all to use on places like Wikipedia. It is easy to post there and gratifying when one's photograph is used.